Like most modern languages, Python has object-oriented programming. This means we can contain data inside of objects, which package their own names for variables and functions (called methods) which interact with the object data. Once we have objects under our belt, we can get rolling on game development!
Relatedly, there are objects called dictionaries, which contain values tied to keys. We'll cover those first.
Dictionaries
A dictionary is a pile of objects tied to keys. Keys can be any immutable object; so, typically, it can be a number or a string. You define a dictionary by typing key: value pairs inside of {} curly braces, with commas in between the pairs. For example:
d = {"a": 1, "b": 2, "c": 3}
For ease of reading, you can also list a dictionary on multiple lines.
d = {
  "a": 1,
  "b": 2,
  "c": 3
}
You can access any element of a dictionary in a similar fashion to accessing a sequence. Instead of only being allowed to use integers for accessing them, you can access them with whatever type of object is being used. For the above, as for most dictionaries, we use strings.
>>> d["a"]
1
>>> d["c"]
3
You can get a list of the keys in a dictionary by using its .keys() method, like so:
>>> d.keys()
dict_keys(['a', 'b', 'c'])
To get it as a list, simply cast it using the list() function.
>>> list(d.keys())
['a', 'b', 'c']
You can loop over the contents of a dictionary easily, using the for loop statement. There's a method called .items() for dictionaries that gives tuples for each key: value pair, like so.
for i, v in d.items():
  print(i, "=", v)
This produces from the above dictionary:
a = 1
b = 2
c = 3
The above system for the for loop works for other sequences where every entry is a tuple of known length, but it's best to stick to using it with dictionaries.
For more information about dictionaries, see https://docs.python.org/3/tutorial/datastructures.html#dictionaries and feel free to look around for other things you can do with them.
Now that we've shown what can be done with dictionaries, let's revisit functions again.
Functions with Variadic Arguments
"Variadic arguments" refers to a number of arguments that can be different between calls to a function. In this case, we're referring to arguments that aren't explicitly defined for a function at all, instead just leaving a placeholder. There are two kinds of variadic arguments you can absorb, unnamed arguments and keyword arguments.
You can handle unnamed arbitrary arguments by naming an argument at the end of the list with a * before it. All remaining unnamed arguments will get shoved into that name as a list.
def ex(*args):
  for i in args:
    print(i)
ex("testing", "this", "out.")
ex("See", "how", "it", "works?")
This will print out
testing
this
out.
See
how
it
works?
To handle arbitrary keyword arguments, add a name with ** before it to the end of a function definition.
def ex(**args):
  for i, v in args.items():
  print(i, "=", v)
>>> ex(name="Jon", age=22, likes="tomatoes")
name = Jon
age = 22
likes = tomatoes
If you have both a *args and a **keywords style argument, you should always put the unnamed args list *args before the **keywords.
def ex(*args, **keywords):
  print("unnamed:")
  for i in args:
    print(i)
  print("named:")
  for i, v in keywords.items():
    print(i, "=", v)
>>> ex("This", "is", "a", "test", name="Jon", age=22, likes="tomatoes")
unnamed:
This
is
a
test
named:
name = Jon
age = 22
likes = tomatoes
Now that you've seen this, and know about how ordinary function definitions with and without default arguments work, you probably have a good idea of how the print() function would be defined. If not, the definition as officially stated in the library reference is:
print(*objects, sep=' ', end='\n', file=sys.stdout, flush=False)
You can read that definition here: https://docs.python.org/3/library/functions.html#print and might be surprised at the existence of the "file" specifier there. We'll explain file input and output in Lesson 12; it's not necessary yet. The same goes for the flush keyword, since that doesn't matter for printing to the console (through that sys.stdout you see up there).
With this, you should have a full primer on how to create functions. Which is good, because next we need to cover objects!
Objects
While everything you can put in a variable is technically an object, we're going to cover how to make your own types of objects here. The name for custom object types is a "class", and a class defines what attributes and methods objects of that class will have.
class MyClass:
  i = 0
  def f(self):
    print("Hello, I'm a new object!")
The above defines a class with one attribute, and one method. If we instantiate this object by writing
o = MyClass()
we get a brand new object of that class! This looks like a function call, but technically it's not one; it's like a pseudo-function.
We can assign to the new object's attribute
o.i = 5
and we can run its method
>>> o.f()
Hello, I'm a new object!
Attributes act just like normal variables, and can thus be assigned to and referenced like a variable. The only difference is that you have to use the . operator to access it.
You might wonder what's going on with that method definition. The first argument to any class method will always be assigned to the object itself. So, within that class, we could have done:
class MyClass:
  i = 0
  def f(self):
    print("Hello, I'm a new object!")
  def seti(self, new):
    self.i = new
and thus when we use this new function, we can set i using o.seti() instead.
>>> o.i = 5
>>> o.i
5
>>> o.seti(20)
>>> o.i
20
The use of the name "self" is simply a convention, borrowed from Smalltalk. Python programmers expect a class's methods to reference the instanced object as self, and using another name would be confusing. So, please stick to using "self" as the name of the first argument for all methods.
Class Constructors
You have the option, when creating a class, of making what's called a "constructor" in most object oriented programming languages. In Python, it's simply called __init__() instead. That's pairs of underscores on either side of the word init, by the way, so remember them.
The __init__ special method is useful for setting data when you create an instance object of that class. It affects the arguments you can send to the class's pseudo-function call. Thus, if we again re-define our example class thus:
class MyClass:
  i = 0
  def f(self):
    print("Hello, I'm a new object!")
  def __init__(self, i=0):
    self.i = i
we can now call MyClass and assign to the i value when we first instantiate the object!
>>> o = MyClass(21)
>>> o.i
21
It's technically also possible to alter the attributes of the class, rather than the object. This isn't generally recommended, as it has odd results. For instance, if there are any default values for attributes in the listing (not the __init__() function, but the class definition), you can alter what the default will be by setting this. However, the attribute can still be assigned for each object individually. There is no separation between "class" and "instance" variables in Python; all are just object attributes.
However, it's important to note what that means for Python. Variables aren't assigned by value, they're assigned by reference. If you assign an instance object's variable to something, it will change for that object only. However, if you have an object defined already for the class, like a list, that list will be shared across all instances of the class!
class Hive:
  thoughts = []
  def __init__(self, name):
    self.name = name # this sets a name for the individual in the hive
  def add_thought(self, thought):
    self.thoughts.append(thought)
If you create multiple members of this, and add thoughts to them, you will get the same list of thoughts for each!
>>> a = Hive("AB")
>>> b = Hive("BB")
>>> a.add_thought("honey is good")
>>> b.add_thought("I should find more nectar")
>>> a.thoughts
['honey is good', 'I should find more nectar']
>>> b.thoughts
['honey is good', 'I should find more nectar']
So you may have noticed that we assigned the "name" attribute to the Hive from the __init__() method. You can do that with any attribute name, and it will assign an instance variable for that attribute. Thus, even though their thoughts are the same, each of these bees has different names.
>>> a.name
'AB'
>>> b.name
'BB'
If we want individuals, we can do this instead.
class Individual:
  def __init__(self, name):
    self.name = name # this sets a name for the individual
    self.thoughts = [] # a blank slate for each individual's thoughts
  def add_thought(self, thought):
    self.thoughts.append(thought)
Now we can assign individual thoughts, and they will stay separate.
>>> a = Individual("Alex")
>>> b = Individual("Bea")
>>> a.add_thought("I like cats")
>>> b.add_thought("I'm more of a dog person")
>>> a.thoughts
['I like cats']
>>> b.thoughts
["I'm more of a dog person"]
Class Inheritance
No object-oriented programming system would be complete without inheritance. The way this works is, you create one class, then you want to create another class like it but with extra parts, it's easier to just create the new class as a sub-class that inherits from the first one.
You do this by writing the first line of the class statement with a new part, like
class SubClass(ParentClass):
Let's give an example, using the Individual class from before.
class Adult(Individual):
  def __init__(self, name, age, job):
    super().__init__(name)
    self.age = age
    self.job = job

c = Adult("Chris", 22, "Programmer")
This should mostly be self-explanatory, but the line containing super() might be a bit confusing. When Python encounters super(), it takes the class of the current method, checks its parent class (also known as a super-class) and returns a reference to that class, but for your current "self" object. With .__init__() being called, it acts like you're accessing the constructor, and lets you assign a name that way.
Once the name is set, the rest of the initiator function continues, setting the age and job accordingly.
Inheritance can also override default values for attributes and override function definitions. If you want to access the function definitions from the super-class within the inherited class methods, you can again rely on super() to re-map those overridden functions to the correct ones.
Note that, without doing this, your calls will always act as if you're applying them to the current object, with its current class; thus, even calls to methods inherited from the old object will call the overridden methods from the new class! When in doubt, if you're trying to access a parent class's methods, use super().
Multiple Inheritance
Yes, it exists. It's extremely confusing and you almost certainly don't need it. Or at the very least, there are better ways to implement whatever you're trying to do with it, without using it right now. Please don't use it. You'll thank yourself later.
A brief introduction to pygame
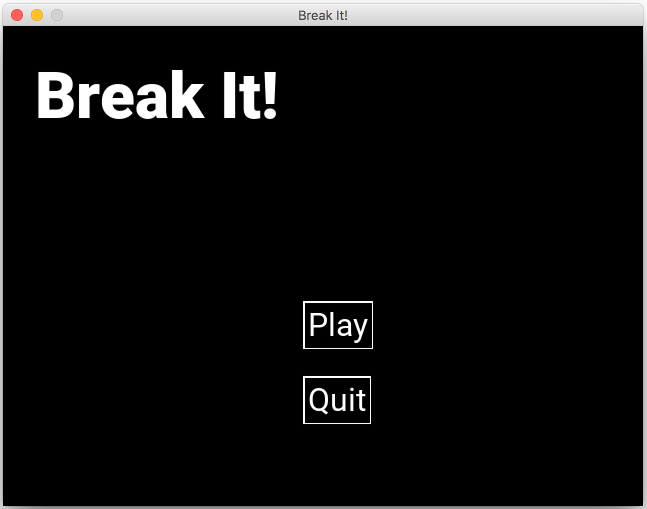
Since we installed pygame last time, and now understand the object oriented approaches needed to use it, we should take it for a test spin! Today we're not going to do too much, we're just going to set up a quick mock-up of a game menu, with only the option to "Play" and to "Quit." (Obviously "Play" won't do anything because we have nothing to play, in this example! But you might, soon.)
We're going on a whirlwind tour of some choice parts of the pygame library, so get ready.
First off, there's not much point in trying to do anything with pygame until you import it, and initialize it. So, the top of your file should read:
import pygame
from pygame.locals import *

pygame.init()
The pygame.locals part lets us import a huge pile of constants, such as event types and key codes, into the main namespace. It'll save us a lot of time.
We should next include a variable for when the game quits.
userquit = False
This will be set to True when it's time to close down the program.
Next, we should create a window. This is done with pygame's display module.
# create a window that's 640 wide by 480 tall in pixels
surface = pygame.display.set_mode((640,480))
# give it a title
pygame.display.set_caption("Break It!")
The above window title is for the game we'll be making in Lesson 12, which is a version of the Breakout and Arkanoid games.
With the window made, we can now create the game loop. The first line creates a clock for us to keep the loop from running too fast, and eating up tons of CPU.
clock = pygame.time.Clock()

# event loop
while(userquit == False):
  # get events
  for e in pygame.event.get([QUIT, MOUSEBUTTONDOWN]):
    if e.type == QUIT:
      userquit = True # good to be able to quit out the normal way
    if e.type == MOUSEBUTTONDOWN:
      userquit = True # since there's nothing for us to do but quit, yet
  pygame.event.clear() # clean up unused events
  clock.tick(60) # run no more than 60 times a second

pygame.quit()
Notice that pygame.event.get is sent a list of pygame event types. Only those event types will be grabbed from the "event queue", the set of events that have happened since the last time the loop ran. Any other events are ignored, and dropped from the queue. Because of clock.tick(60), this happens once every 1/60th of a second, unless something slows it down.
Right now, this program won't do much of anything. It'll run, create a window, then wait for the user to hit the Quit option in the application menu or click on the window. Quit in the menu is what sets off pygame's QUIT event; the other option is just to make it quit more easily. It's not much, but it's a start!
If you're running this in IDLE you'll find that it won't close out entirely. Just use exit() in the REPL window to close out. Running in the console or Python Launcher will exit as normal.
Next, let's start making some visuals on screen. This is supposed to be a main menu after all!
The following block of code should be added after clock is defined, and before the main while loop. It is rather a lot, I know; however, I've included comments that are as detailed as I can make them. If you have trouble understanding how something works, or want to know more about a part of the language, the documentation is at http://www.pygame.org/docs/. The top bar has navigation links to every part of the library, so you can read up in more detail when you need to.
# A user interface element with a defined surface,
# and optional surfrect Rect where the actual image data for the element appears
# Also may receive an optional offset, a tuple of (x,y) pixels from top left
# at which to blit the element onto the window's surface.
# Most UI elements will need this offset.
# Stores the surface for its appearance, to be rendered by another object.
# Also stores the rect defining its position in the UI, for collision detection.
class UIElement:
  surface = None
  surfrect = None
  rect = None

  def __init__(self, surface, surfrect=None, offset=(0,0)):
    self.surface = surface
    self.surfrect = surfrect
    # calculate rect in window from our info.
    if surfrect == None:
      r = surface.get_rect()
    else:
      r = surfrect.get_rect()
    dim = (r.w, r.h)
    self.rect = pygame.Rect(offset, dim)

  # use this function to retrieve the offset, e.g. when blitting.
  def get_offset(self):
    return (self.rect.x, self.rect.y)

# displays the main menu and tests for clicks on its buttons.
# edit this to change the contents of the main menu
class MainMenu:
  # set empty attributes, so we can keep track of what to fill
  # we'll fill these with UIElements on init
  title = None
  play_button = None
  quit_button = None
  background = (0,0,0) # background color of entire menu
  clicking = None
  # initialize fonts; if None is given instead of a filename, uses default font.
  # second argument is size of font to use.
  # Here we're using the Roboto font by Christian Robertson et al,
  # provided through Google Fonts.
  title_font = pygame.font.Font("Roboto-black.ttf", 64)
  button_font = pygame.font.Font("Roboto-regular.ttf", 32)

  def __init__(self, surface=None):
    # optional "surface" attribute should be the window surface.

    # Color format is (r, g, b) with values from 0 to 255.
    # You can also include a fourth element to the tuple for "alpha";
    # 255 is opaque and 0 is transparent. Without it, always opaque.
    fg = (255,255,255) # white for foreground color
    bg = (0,0,0) # black for background color

    pad = 5 # padding around button text, 5 pixels in this case.

    # font.render(text, antialias, text_color, background)
    # "Antialiasing" removes jagged outlines to text with some sub-pixel calc.
    # these render text to a new surface, then return that surface.
    # default background is "None" which would be transparent. Otherwise,
    # that argument takes a color.

    # create the title element
    s = self.title_font.render("Break It!", True, fg, bg)
    self.title = UIElement(s, offset=(32, 32))

    # create the Play and Quit buttons
    t = self.button_font.render("Play", True, fg, bg)
    # we'll need a separate surface to render the text to,
    # with proper padding.
    r = t.get_rect() # get the rectangle for that text
    # create a size tuple w/ padding for all four sides (thus 2x per dim)
    size = (r.w + pad * 2, r.h + pad * 2)
    # then use that to create a new surface.
    s = pygame.Surface(size)
    # finally, blit the text onto this new surface.
    s.blit(t, (pad, pad))
    # draw a border rectangle in the surface we're using
    pygame.draw.rect(s, fg, s.get_rect(), 2)
    self.play_button = UIElement(s, offset=(300, 275))

    # repeat the above, but for the quit button.
    t = self.button_font.render("Quit", True, fg, bg)
    r = t.get_rect()
    size = (r.w + pad * 2, r.h + pad * 2)
    s = pygame.Surface(size)
    s.blit(t, (pad, pad))
    # and border rectangle again
    pygame.draw.rect(s, fg, s.get_rect(), 2)
    self.quit_button = UIElement(s, offset=(300, 350))

  # render() renders the menu to a surface.
  def render(self, surface):
    # first, fill the entire window surface with our background color.
    surface.fill(self.background)

    # blit the title and buttons to their positions.
    # if we included a third argument it would let us use the .surfrect
    # for the element; since we're using the whole surface for each
    # element, we don't need that argument.
    surface.blit(self.title.surface, self.title.get_offset())
    surface.blit(self.play_button.surface, self.play_button.get_offset())
    surface.blit(self.quit_button.surface, self.quit_button.get_offset())
    # and that's it! Simple enough.

# instantiate main menu
mainmenu = MainMenu()
# and render it, as it's the first screen we'll see in game.
mainmenu.render(surface)
# finally, make it actually appear on screen (otherwise the default image,
# an empty grey field, will remain forever)
pygame.display.flip()
This defined two new object classes, UIElement and MainMenu.
- UIElement is a generic class for user interface parts, like the title label, and text-filled buttons. Normally, you would have classes for each type of UI element, but here we're rolling our own as fast as possible, and there are only a few to deal with. UIElement may work as a good base class to extend into things like buttons or UI timers.
- MainMenu is the special class for the main menu rendering. We will soon add more parts to it, so it can detect button clicks, but we don't need those just yet.
We're also including two fonts from the Google Fonts typeset Roboto, which you can extract from this zip file, Roboto.zip. You can also download the package from the Google Fonts website, though how might not be obvious; thus, the zip file.
Once you insert this code as specified, preferably with some space in between to read it better, run your program again and you should see the main menu appear! None of the buttons do anything, however, and clicking anywhere just quits out. Let's fix that part next.
First, let's add methods to the MainMenu class, at the end of its definition. These two methods will handle MOUSEBUTTONDOWN and MOUSEBUTTONUP events (so, when you press and release a mouse button) and, when combined, will produce a "click" result for the main loop to handle.
  # Should be sent a MOUSEBUTTONDOWN event. Tests for clicks on buttons.
  # returns True if a click landed inside a button.
  def mousedown(self, event):
    # grab event pos
    pos = event.pos

    # check collision of UI button rects with mouse position
    # if the function returns True, the player has mouse down on that button.
    if self.play_button.rect.collidepoint(pos):
      self.clicking = self.play_button
    elif self.quit_button.rect.collidepoint(pos):
      self.clicking = self.quit_button
    else:
      self.clicking = None
    if self.clicking == None:
      return False
    else:
      return True

  # Should be sent a MOUSEBUTTONUP event. Tests for clicks on buttons.
  # return True if a click has been completed on a button
  # (the same as .mousedown() got before)
  def mouseup(self, event):
    # if we're not currently clicking on anything, this just fails.
    if self.clicking == None:
      return False

    # grab event pos
    pos = event.pos

    # check collision of UI button rects with mouse position
    # if the function returns True, the player has mouse down on that button.
    if self.clicking != None and self.clicking.rect.collidepoint(pos):
      return True
    else:
      self.clicking = None
      return False
We'll also create two new functions, mm_mode and play_mode, which will handle the event loop from now on. These are two different modes, which the program knows to swap between as needed based on user input or timers. Place these right below the code you just inserted from above (and outside of the MainMenu class, of course).
# main menu event loop mode
# return False if user quits
# will change the "mode" variable if needed
def mm_mode():
global mainmenu, surface, need_update, mode
if need_update:
# render the main menu and flip so the screen updates.
mainmenu.render(surface)
pygame.display.flip()
need_update = False # until next we need an update.
for e in pygame.event.get([QUIT, MOUSEBUTTONDOWN, MOUSEBUTTONUP]):
if e.type == QUIT:
return False # respond to quit signal
elif e.type == MOUSEBUTTONDOWN:
mainmenu.mousedown(e)
elif e.type == MOUSEBUTTONUP:
if mainmenu.mouseup(e):
# means we have a successful click! find out what got clicked and clear it.
if mainmenu.clicking == mainmenu.play_button:
# switch to play mode
mode = play_mode
need_update = True # because the screen needs to change
mainmenu.clicking = None
break
elif mainmenu.clicking == mainmenu.quit_button:
# time to quit, then
return False
return True
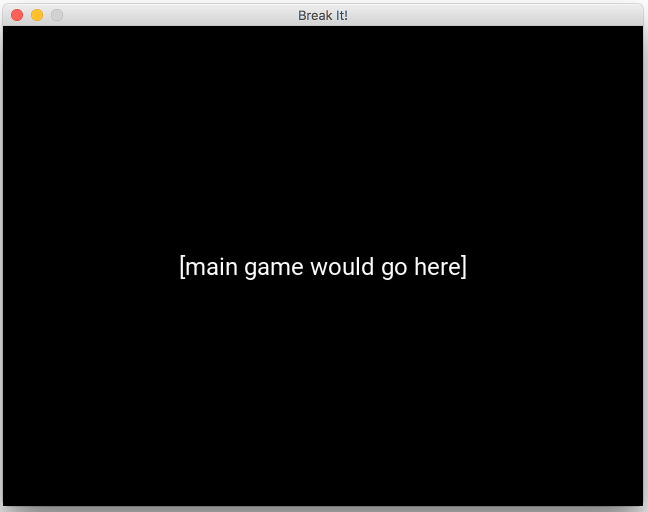
def play_mode():
global mainmenu, surface, need_update, mode
if need_update:
# there's no actual gameplay yet, so we need a placeholder.
# set our foreground and background colors
fg = (255,255,255) # white for foreground color
bg = (0,0,0) # black for background color
# pull up a 24 pt font
f = pygame.font.Font("Roboto-regular.ttf", 24)
# make a text placeholder box
t = f.render("[main game would go here]", True, fg, bg)
# get a copy of that surface's rectangle
r = t.get_rect()
# translate that rectangle to the center of the window surface
r.center = surface.get_rect().center
# r.topleft is now where we need the offset of t to be,
# when blitted onto the window surface.
# clear the screen
surface.fill(bg)
# and place our text on it.
surface.blit(t, r.topleft)
# finally, use "flip" to put the new frame on the screen
pygame.display.flip()
# because this is a static image, we don't need to update it
# until we get input.
need_update = False
# also, let's set a timer. This USEREVENT, we will treat as
# when we need to swap back to the main menu.
# This timer is in milliseconds, 3000/1000 = 3 seconds wait
pygame.time.set_timer(USEREVENT, 3000)
for e in pygame.event.get([QUIT, USEREVENT]):
if e.type == QUIT:
return False # respond to quit signal
elif e.type == USEREVENT:
# time to switch back to the main menu.
mode = mm_mode
need_update = True # because the screen needs to change
break
return True
Next, replace all code from "# instantiate main menu" down with the following:
# instantiate main menu
mainmenu = MainMenu()
# create the "mode" for the UI's current state.
# this should be one of the _mode functions to run.
mode = mm_mode
# need_update is True when the screen needs to render a new frame.
need_update = True

# main loop
while(mode()):
  # mode function handles all events, rendering, and mode switching.
  pygame.event.clear() # clean up unused events
  clock.tick(60) # ensure loop runs no faster than 60 FPS

pygame.quit()
You can also get rid of the line near the top that says "userquit = False" if you wish; it is no longer used for anything.
With that, we should be done! Give your new version of the program a try. It may look a bit ugly, but it's working! Plus, if you're worried about it looking a bit shabby on the main menu, that's what assignments are for.
Preview
The next three lessons will all be about game development.
Lesson 12 will be an exploration of the code to an Arkanoid clone, built off this code as a starting point. You will then extend this Arkanoid clone to add a few features of your choice.
Lesson 13 will give some tips on how to create your own game; you will have one week to create something small, but functional, based on one of the examples given, or an original design of your own.
Lesson 14 will cover project management and team management skills. You will be encouraged to look at existing works for inspiration, and begin your team project: a one month game jam. This will be your final project.
Exercise: Programming Assignment L11
This lesson, we covered how to make user interface elements, if simple ones. This assignment shouldn't be too difficult, if you were able to follow along. There are two parts.
Make the main menu prettier by centering the title and buttons inside the window.
Add your own name in a similarly centered text box, reading in the form of "by Your Name", below the main title but above the buttons. The text should be smaller than the title's text, but the rest is up to you.
You may also make the text prettier in any other way you choose, select different colors for elements, and so on. This is a test of your ability to change the UI. Feel free to have some fun with it! If you want to use a different font, try looking at the Google Fonts selections for ones you're allowed to download and use; just don't include more than you need in the .zip file you send.
If you need help getting the program to work in the first place, a fully functional version of the final program in Lesson 11 is here: L11-breakit.py If you use this link, please make sure you fully understand what's going on in this program before moving on to the next assignments. Reading existing code is very important to Lesson 12's exercise.
Hints:
You may have noticed that the placeholder play_mode uses the surface.get_rect() return's .center attribute to set the .center of its text, and that resulted in a perfectly centered placeholder. Rects also have handy, single number co-ordinates for the centers of their sides, .centerx and .centery. You want to center-align the menu elements in the horizontal dimension, not the vertical.
You'll be adding a new UIElement to the MainMenu object for this part. Other than that, if you can do part 1 fine, you should know what to do for this.